
LeadBooker CRM allows you to use the "Advance Search" filter.
"Advance Search" filters play a huge role in narrowing down large volumes of Leads or deals to the ones that are most important. No need to waste time looking at Leads that are unusual and not crucial. Create Advanced Filters that add context to your search, so you can filter out those that you need to concentrate on and decide on the best course of action.
Follow these steps for how to use the "Advance Search" filter in LeadBooker CRM.
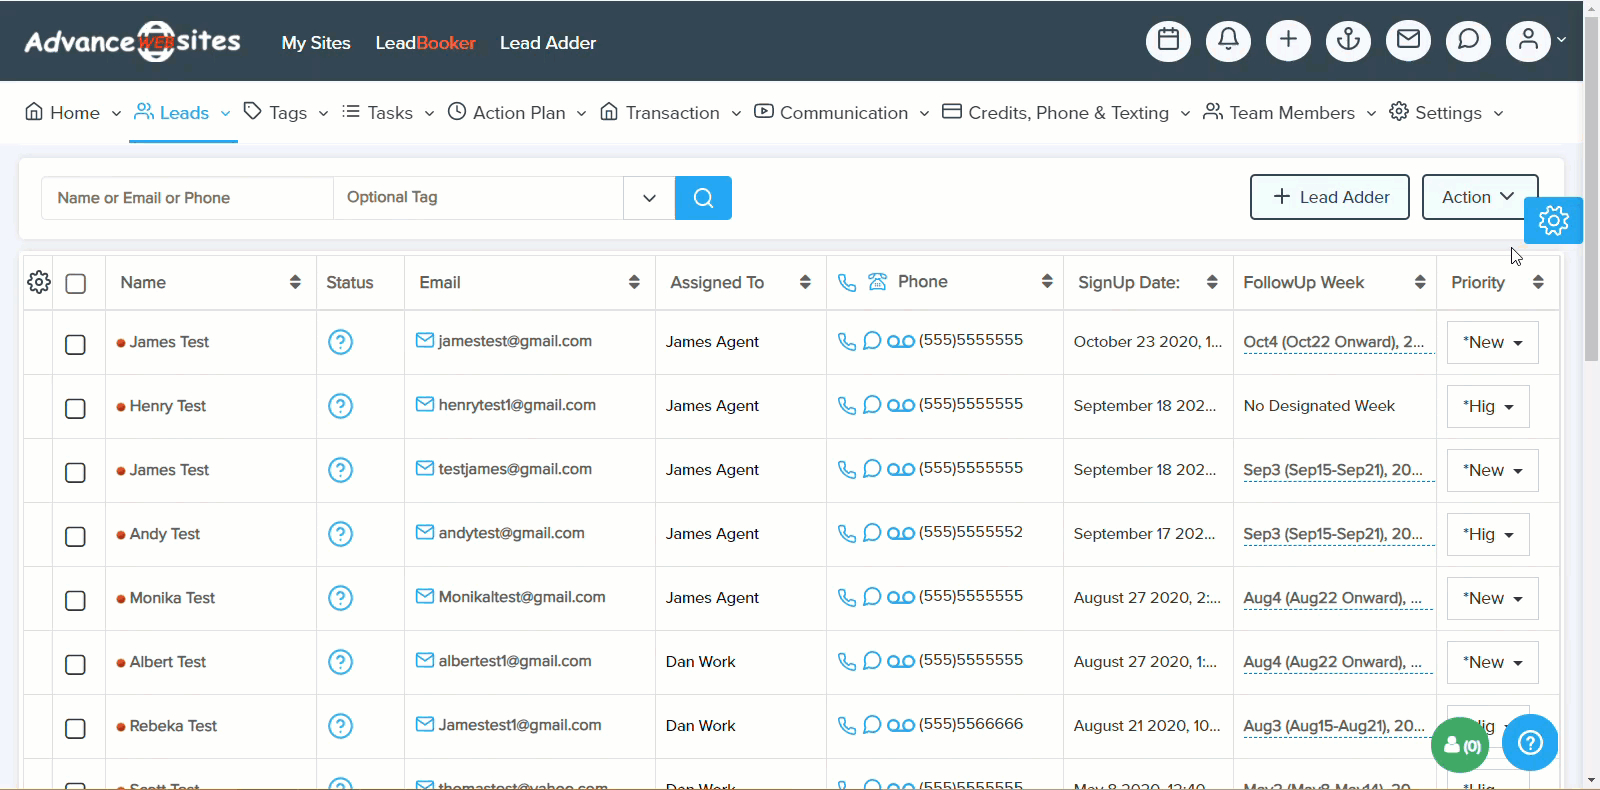
To use the "Advance Search" filter, enable this by clicking on Setting Icon in the right side (As shown in the below gif)
- Go to LEADS
 Click on FILTERS. By clicking on that button a new sidebar will open as shown in the image below.

- In this sidebar, you can add the desired matching conditions to the filter. In a single filter, you can add as many matching conditions as you want. (Note: The list of saved filters will show, if you already have saved filters(Explained Below))
Each filter condition has three properties
Field Name - whom you want to apply a filter (ie: First, Last Name, Email, Phone, Tags, Lead Type, Date Range, city, state etc...)
Field Match - In this filter, you can find the records matching the field value or records without that field value (ie: Is, Isn't etc...)
Field Value - In this filter, you can match the field value for the filter condition.

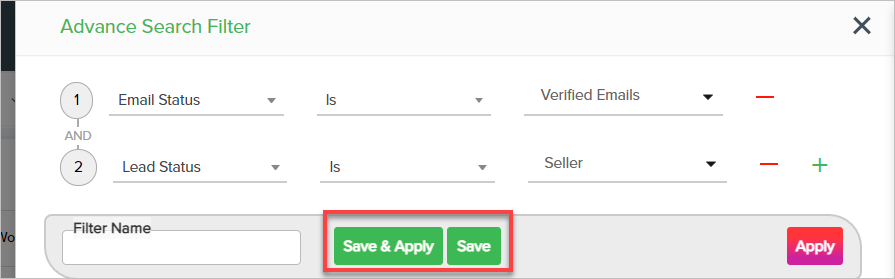
Example 1 - If you only want to see sellers Leads email that is verified in LeadBooker CRM
For this, you need to apply two filter conditions in two fields. One field is Lead Status and the other is Email Status
Lead Status => Is => Seller AND Email Status => Is => Verified Emails
Save this filter to use it in the future as shown in the image below (give it any name like Verified Sellers etc).
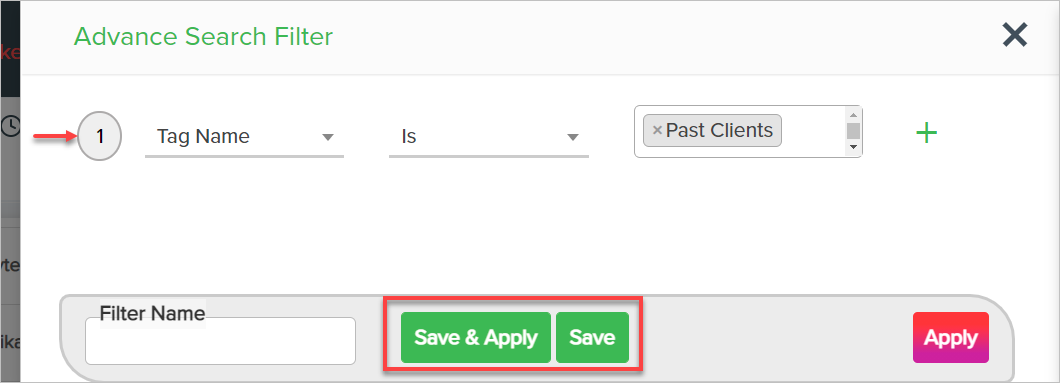
Example 2 - If you want to only see the Leads that you tagged as Past Clients
For this, you need to apply a single filter condition on the Tag Name field.
Tag Name => is => Past Clients
Save this filter to use it in the future as shown in the image below (give it any name like Past Clients etc)
How to manage saved "Advance Search" filters.
Filter List Page
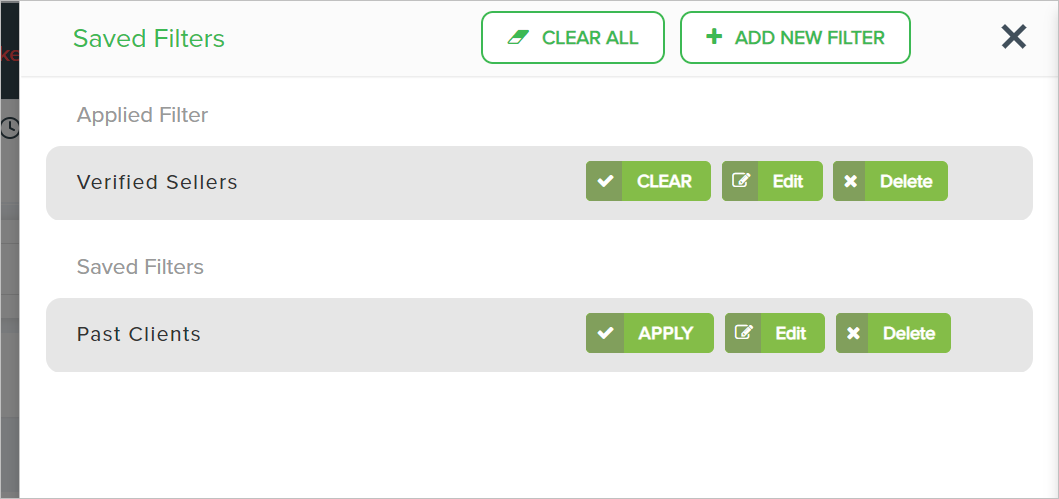
Apply - Click to apply the saved filter. After applying the saved filter, the Leads matching the filter criteria will be displayed until you clear this filter.
Clear - Click to clear the applied filter.
Edit - Click to update the matching conditions for the filter.
Delete - Click to delete the saved filter
Filter Edit Page
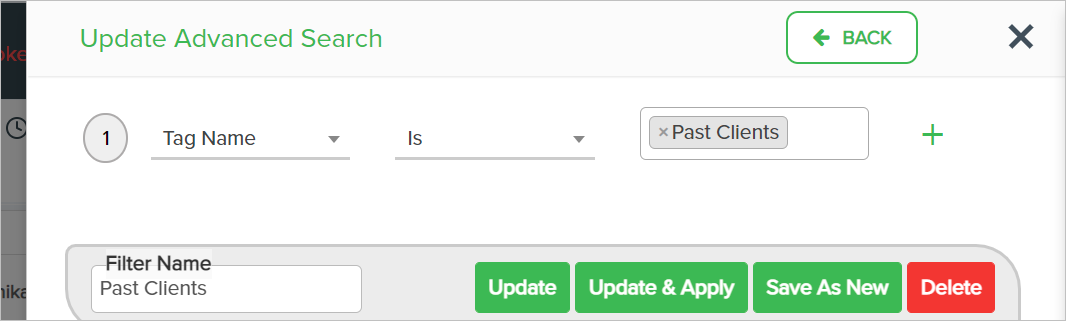
Update - Click to update the matching conditions for the filter
Update & Apply - Click to update the matching conditions and to apply the same filter.
Save As New - Click to copy the existing filter and save it as a new filter in the system.
Delete - Click to delete the filter.
Filter Add Page
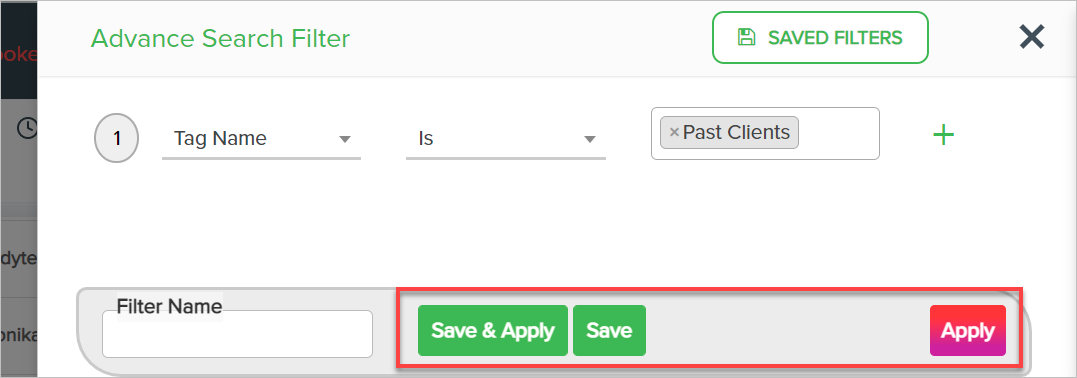
Apply - Click to apply the matching conditions inside the filter. Clicking on this button will only apply the filter and not save the filter for future use in the system.
Save & Apply - Click to save and apply the matching conditions inside the filter.
Save - Click to save the filter for future use.
Comments
0 comments
Please sign in to leave a comment.