
Overview:
Action Plans allow you to stay in touch with your contacts. LeadBooker CRM comes with an extensive library of successful default Action Plans. The user can use these default Action Plans according to their needs.
Uses of the Action Plan:
1) Automatically sends emails to your existing or new Leads for an unlimited period of time.
2) Automatically creates follow-up tasks for existing or new Leads.
Once you assign a Plan to a contact, it schedules follow-up tasks/upcoming Email activities in the Action Plan.
To manage Action Plans, log in to LeadBooker CRM Action Plan tab as shown in the below image:
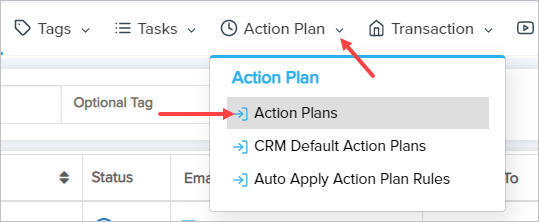
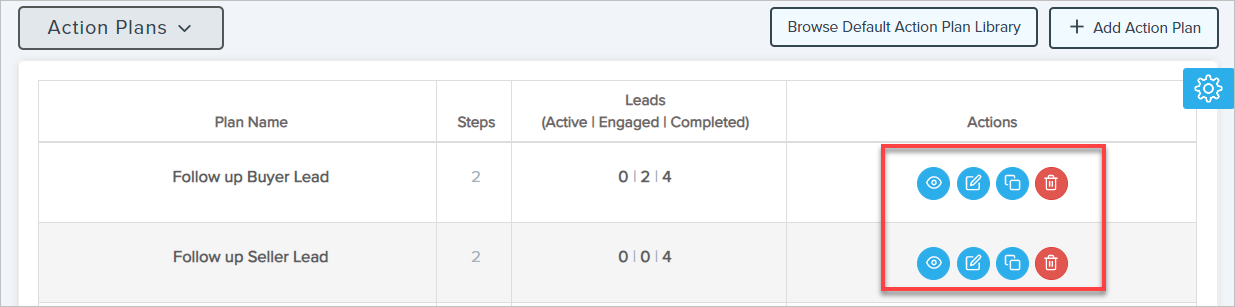
From this page, the user can manage(ADD/EDIT/DELETE/VIEW/COPY) the Action Plan.
1) Add Action Plan: To add an Action Plan, click Add Action Plan or copy/add the Action Plan from the list of the Default Action Plans by clicking on Browse Default Action Plan Library.
Note: Click here to copy/add Action Plan from the default action plan list.
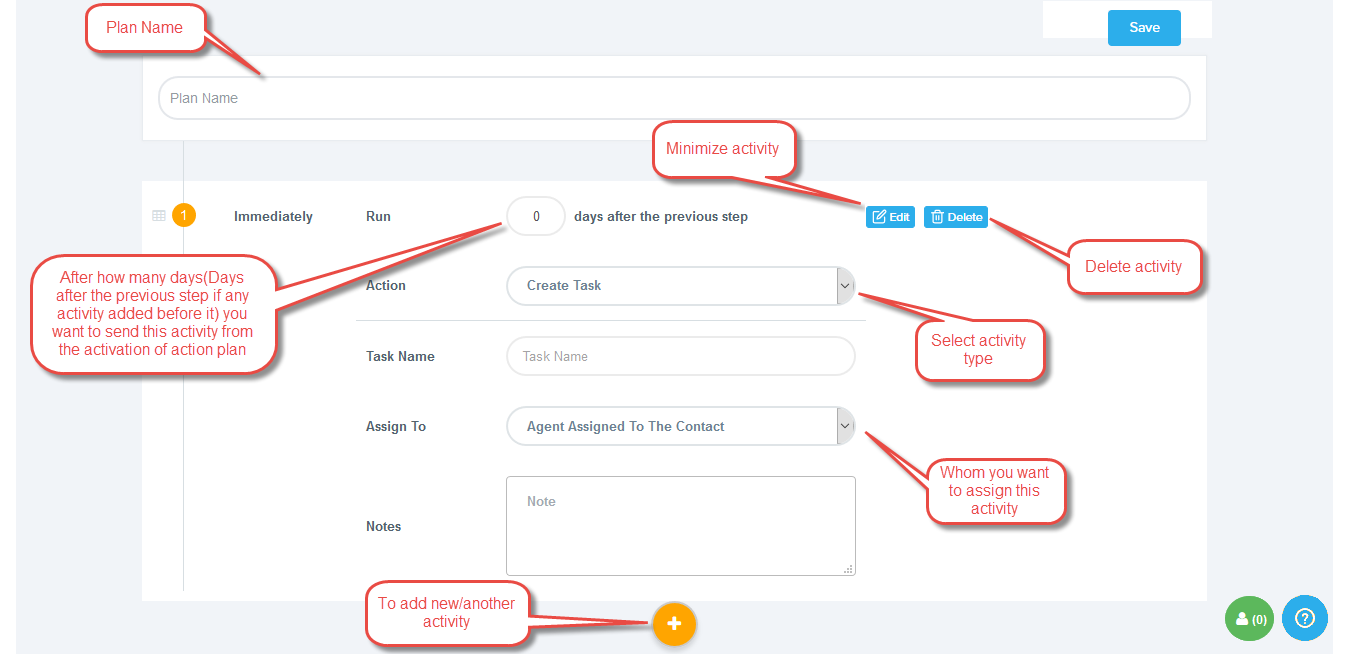
To add an Action Plan, follow the steps in the below image:
A) Enter the plan name.
B) Enter the days, after how many days you want to send the first activity (Days after the
previous step if any activity is added before it).
C) Select the activity type Task/Email/Voicemail/Pause plan.
Below are the options according to activity type:
i) Task: This activity will assign the task to the owner or Lead assigned agent(As
selected option).
a) Task Name: Enter the appropriate title for the task.
b) Assign To: Select who you want to assign the task to.
ii) Send Email From Assigned Agent/Send Email From Owner: This activity will send the email to the Lead from the owner or Lead assigned agent (As selected option).
a) Email Template: Select the email template you want to send, from the drop-down. To edit the email template, click on the edit icon on the right side (Email template contains the body of the email/mail).
b) Subject: Click on the edit icon to change the subject.
c) Include Signature: Select Yes if you want to send a signature in the email otherwise select No.
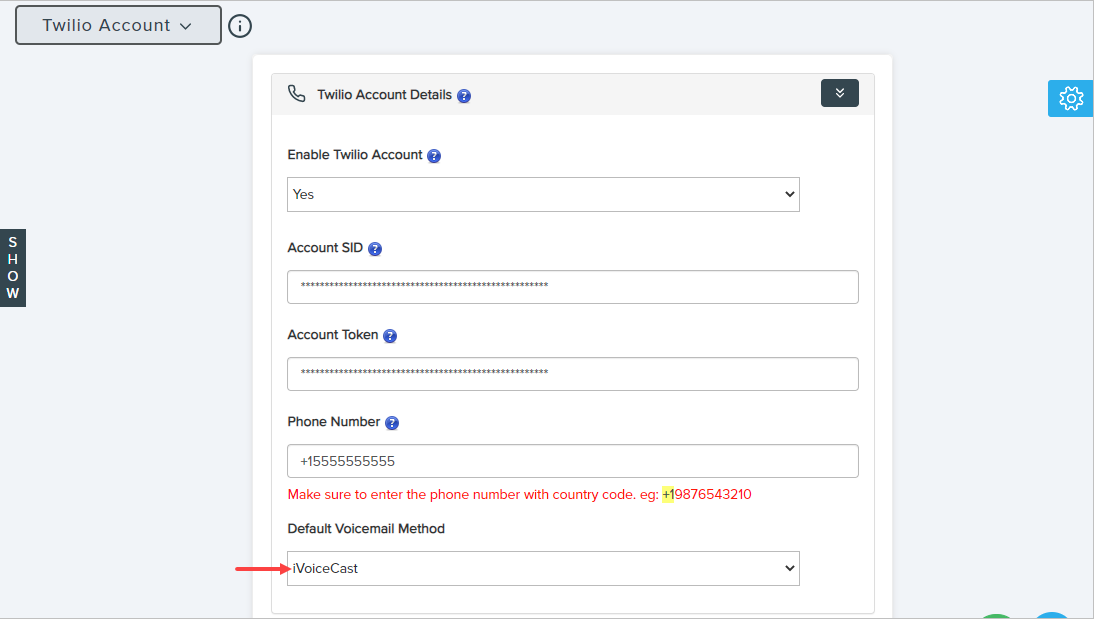
iii) Send Voicemail: This activity will send a Voicemail to a Lead from the owner. Select
the voicemail audio you want to send to the Lead, from the Voicemail Audio drop-down.
The Voicemail will be sent using the default selected Voicemail method
(Twilio/Slybroadcast).
The user can change the default Voicemail method from the Twilio Account or
Slybroadcast Account tab as shown in the below image:
Note: The Slybroadcast Voicemail will be sent only to the phone numbers who
have activated Voicemail service.
iv) Pause All Other Action Plans: This activity will pause all other Action Plans
for the Lead.
v) Pause Specific Plan: This activity will pause the selected Action Plan for the Lead.
Action Plan: Select the Action Plan you want to pause for the Lead.
D) Click Save to save the Action Plan or you add more activities as in the below image.
2) Edit Action Plan: To edit an Action Plan, click on the Action Plan name or edit icon on the right side as shown in the 1st image
3) View Action Plan: To view an Action plan, click on the view icon on the right side as shown in the 1st image.
4) Delete Action Plan: To delete an Action Plan, click on the delete icon on the right side as shown in the 1st image.
5) Steps: The Steps column displays the number of activities included in the Action Plan.
6) Leads: This column shows the number of Leads associated with the Action Plan:
a) Active: Displays the number of Leads/contacts who are active in the Action Plan.
b) Engaged: Displays the number of leads/contacts whose Action Plan has not been completed
because the Action plan is deleted or paused.
c) Complete: Displays the number of Leads/contacts who have completed the Action Plan.
Video to add/view/edit/delete action plan.
Related Articles:
Comments
0 comments
Please sign in to leave a comment.